In the previous article, you’ve learned how to use the ternary operator, next on the menu is to learn how to use your new knowledge of operators to separate particles into channels. Along the way, you’ll also learn some types of values to use when working with particles.
Just as we often break our composite into miniature composites for individualized control, the same should be applied to particles. One way you can do this is by using channels ( or groups, or streams, depending on who you talk to ).
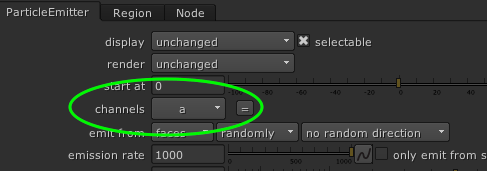
Channels are set up by the ParticleEmitter node, by default all particles are emitted into channel “a”.
Let’s use this example of particles emitting from a sphere:
Each particle in this simulation enters channel “a” when birthed. Any particle operations we do after will affect all particles at the same time.
But what if we need to split the particles into two groups that mirror each other in the X-axis?
The ParticleExpression node will help us achieve this.
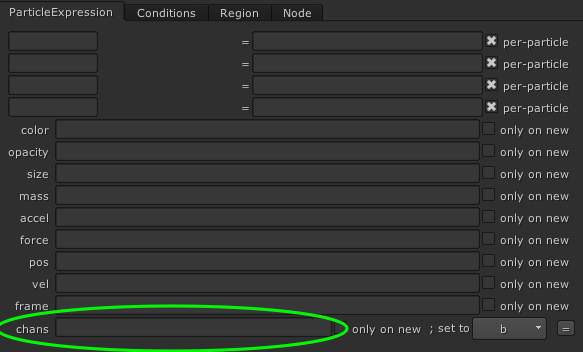
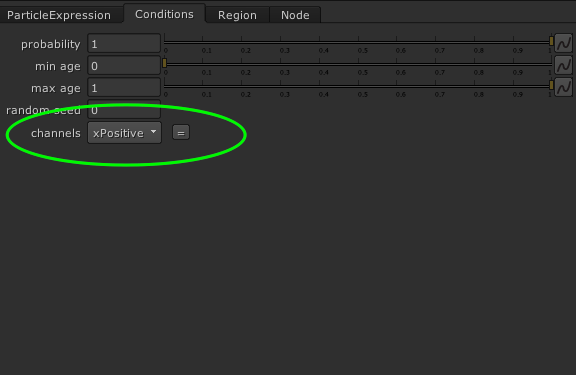
In the very bottom of the ParticleExpression node, you will see a channels field.
First, we’re going to create the screen right channel of the X-axis mirror with this expression:
x(pos) > 0
You might be confused by this cryptic text, so let’s take a closer look:
- “pos” is an attribute built into the particle system that stores particle positions in X, Y and Z as a vector value
- “x()” is an expression to return the value of the X component of a vector
- “x(pos)” is returning the X component of the position vector
- “>0” is comparing if the preceding value is greater than 0
- The return value ( or result ) of this expression is a boolean
If we have a particle with a “pos” value of ( 3, 10, 4 ), this expression will first return a value of 3, which is the X component of the position vector, and then checks if it’s greater than 0, which it is, and the expression will return 1 ( True ).
Once we write this expression in the channels field of our ParticleExpression node, it will be evaluated for each particle and put them into channel “b” if the expression returned 1, or do nothing if the returned value is 0.
But “b” is not a very descriptive name for a channel, so let’s change that:
I just realized that this is starting to be quite a brain dump, and to avoid writing an essay, I’ll quickly show you how to set custom vector values using expressions:
v(x,y,z)
- v() is an expression to set a vector value
- x, y, z are components of this vector
So if we wish to set the position of a particle to x(33),y(12),z(-3) we can do so like this:
v(33,12,-3)
You can use this expression to set custom values to any vector attribute.
Many attributes in the ParticleExpression node are vectors but some are not, so here’s a picture of what value each attribute enjoys working with:
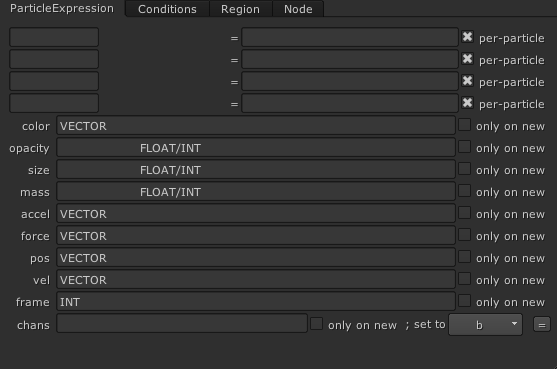
Apologies for the scrambledness of my articles.

Back to visualizing our new channel …
… and to visualize our new channel, let’s connect another ParticleExpression node and set the channel to operate on to “xPositive” and color the particles red by using the expression v(1, 0, 0).

Let’s repeat what we’ve just done to the left side of the X-axis now:
In a new ParticleExpression node, use the expression below in the channels field:
x(pos) < 0
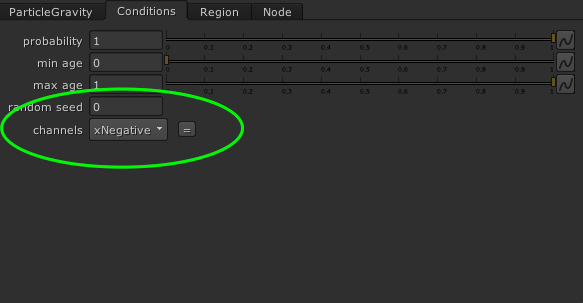
… and then create a new channel called “xNegative”.

Using another ParticleExpression to visualize channel “xNegative” as v(0,1,0):
At this point, our channels have been successfully created based on our original intention of mirroring in the X-axis. We can now apply particle operations to each channel individually without affecting the other.
We can define which channel an operator will affect by setting it here:
After a few particle operators have been added, each with their own defined channel to operate on, we can begin to see the fruits of our labour.
We’ve used our knowledge of operators and vector attributes to define custom channels in this article, but there are some other useful ways to define channels as well, such as based on velocity, position, age, or even random particle ID.
With the ability to setup custom channels in Nuke’s particle system, you can create fun simulations such as this nifty particle gun:

And with a little bit more effort we can even fake some nice rigid body simulations for use as elements for compositing:

Yes, those shots got approved.
I believe we’ve gotten enough of the basics out of the way to go beyond in future articles. You’ll see me break down some of the more complicated set ups using Nuke Particles, starting with how to make fire with particles like in this shot:
